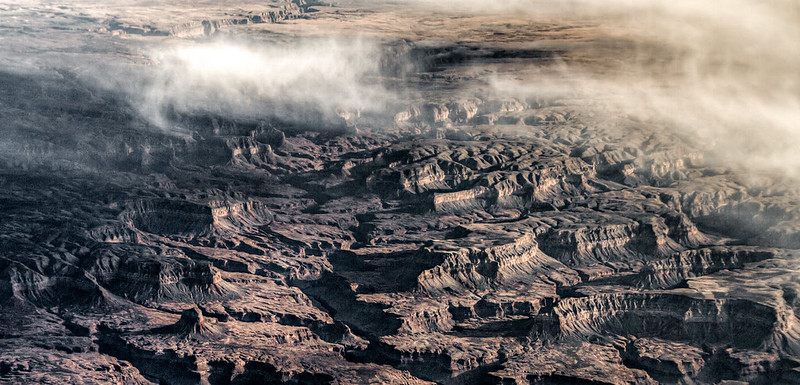
Let's talk post-processing, the "final" step in digital photography. Often, this is the most involved, and can save even terrible photos. I rather like a shot I recently took and put through the paces, so I figured I'd document the high-level view here. Not the individual steps mind you (there are plenty), but enough to show why this is such a key part of the process. Each picture can be clicked to show a larger version.
My route home from Las Vegas flies over/around The Grand Canyon. Usually, I'm in an aisle seat, or asleep, or my camera is in the baggage compartment, or it's 1am and dark. My last trip, I made sure that none of these was an issue -- I flew home in the afternoon in a window seat on the right side of the plane, with my camera in my lap. Then I fell asleep. But I woke up just in time.
One of the MANY pictures I took was this one:

Nothing special, it's washed out, poorly-composed, and looks very little like what I saw. But I loved the landscape, the plateaus and canyons and cliffs. I figured I had to be able to save something of this shot. So I ran it through a bunch of Lightroom editing to get to this:

Better,but I'm still not a fan of my crop, it's VERY blue, and the details are still ill-defined. So to Photoshop it did go for some sharpening. Then there was more editing in Lightroom after that to come to this:

Now we're getting somwhere. The colour is reaching something recognizable, the details are, well, detailed, I like the crop more, and the contrast is showing off the depth of the scene. I could have left it here and been fairly happy with it. In fact, I almost did. But then I decided to see if running it through Photomatix as a 1-image pseudo-HDR shot would add anything.
It was a good call. It cleared it up even more, brought out more detail, and was a measurable improvement. I went through another round of editing in Lightroom, now mostly tweaking, and called it day and uploaded it. Then I looked at the next day and realized how BLUE it still was. Being away from my computer, I opted to play with a few other options. On my phone with Snapseed I hit the "auto" button and was immediately sad that it had fixed it so well. Then I tried the same with Flicker's online editor and it automatically made the blue shot even better than Snapseed had.
Well, this upset me a bit, because I figured I should be better able to tune a photo on my desktop with all my fancy software better than an app on my phone or some Yahoo! web tool. So I returned home and started futzing with colours and white balance and saturations until I was able to replicate what my phone could do. This is the final product:

Deeper shadows, the blue gone, the haze lifted, the details popping out - what a difference from that original image up top. There are trade-offs to this - the noise is pretty obvious in some areas, and what noise-reduction I did apply smoothed out some of the rougher edges to the rocks. It's also developed a somewhat surreal, alien-world look, but I rather like it myself.
There's more that could be done here. I could work on specific shadows, do some localized noise reduction, manually edit details. I may still do some these things. Eventually though, I have to step back and stop, otherwise it's a paintbrush on individual pixels that nobody will ever notice.
Of course, not every shot needs all these steps, and a lot of an editing workflow becomes second nature over time. Still, the fact that I go through every shot I take to one degree or another has really slowed down the rate I post photos. But then again, it's also made me somewhat more picky in what I choose to actually show.
Saturday, March 22, 2014
The Final Step
Posted by
Astin
at
6:36 PM
![]()
Labels: Las Vegas, Not Poker, photography, travel
Subscribe to:
Post Comments (Atom)
1 comment:
Super article. Include more articles about this topic. Thank you for sharing. Thank you againclipping path service
Photo Retouching Services
Background Removal Service
.
Post a Comment